Showing posts with label Embroidery. Show all posts

Thursday, April 11, 2013

Cross Stitch Canvas DIY

You can't call yourself a crafter if you've never cross stitched!  It's a right of passage in the crafting world and it is a 'must-do-at-least-once' kinda thing.  Recently it has become extremely popular to incorporate cross stitch into modern home decor.


 Here is a great 1st time project or just an updated way to practice cross stitching.


1st step, paint your canvas.  If you want to go with a white background, I still suggested painting it with white paint.   Sure, the canvas is already white, but it will make a more finished look and will show that the white was intentional.

2nd step, map out your lettering.  I printed a large font from my computer and used the print as a template.  Then I made a grid to map out my stitches.


3rd step, paint the word Sweet.

4th step, with the grid as a guide, I taped it onto the back of the canvas and using a thumb tack, I poked the holes where each of the corners of the crosses would be.  Then start stitching using yarn.


And whaaaalaaa, you have a simple and unique addition to your home decor or a really nice home made gift to give.


Enjoy! 

Monday, December 31, 2012

Oh MY!!!

I can't believe that it has been so long since I last posted!!  Christmas season this year was crazy, to say the least.  The preparations and the family that we visited kept us very busy.  This year I decided not to make my Christmas cards...  that adds a whole new level of busy onto an already busy season.  Plus this year I was a little more interested in making my gifts.

And so here are some of the gifts that I made...

I made a TON of these Headbands/Ear Warmers this year:


...  I had to make one for my in-law's dog too!!!  :-)

I had fun mixing yarns for a cowl:

This is the flip toy that I made for my 4 month old nephew.


And he needed a hat too, although it didn't fit because lil man had a HUGE head!  :-)

 I made a similar hat for my son's teacher.... hopefully it fits :-/

I also make a bunch of these scarflettes:


I made this ruffle scarf for my ma...

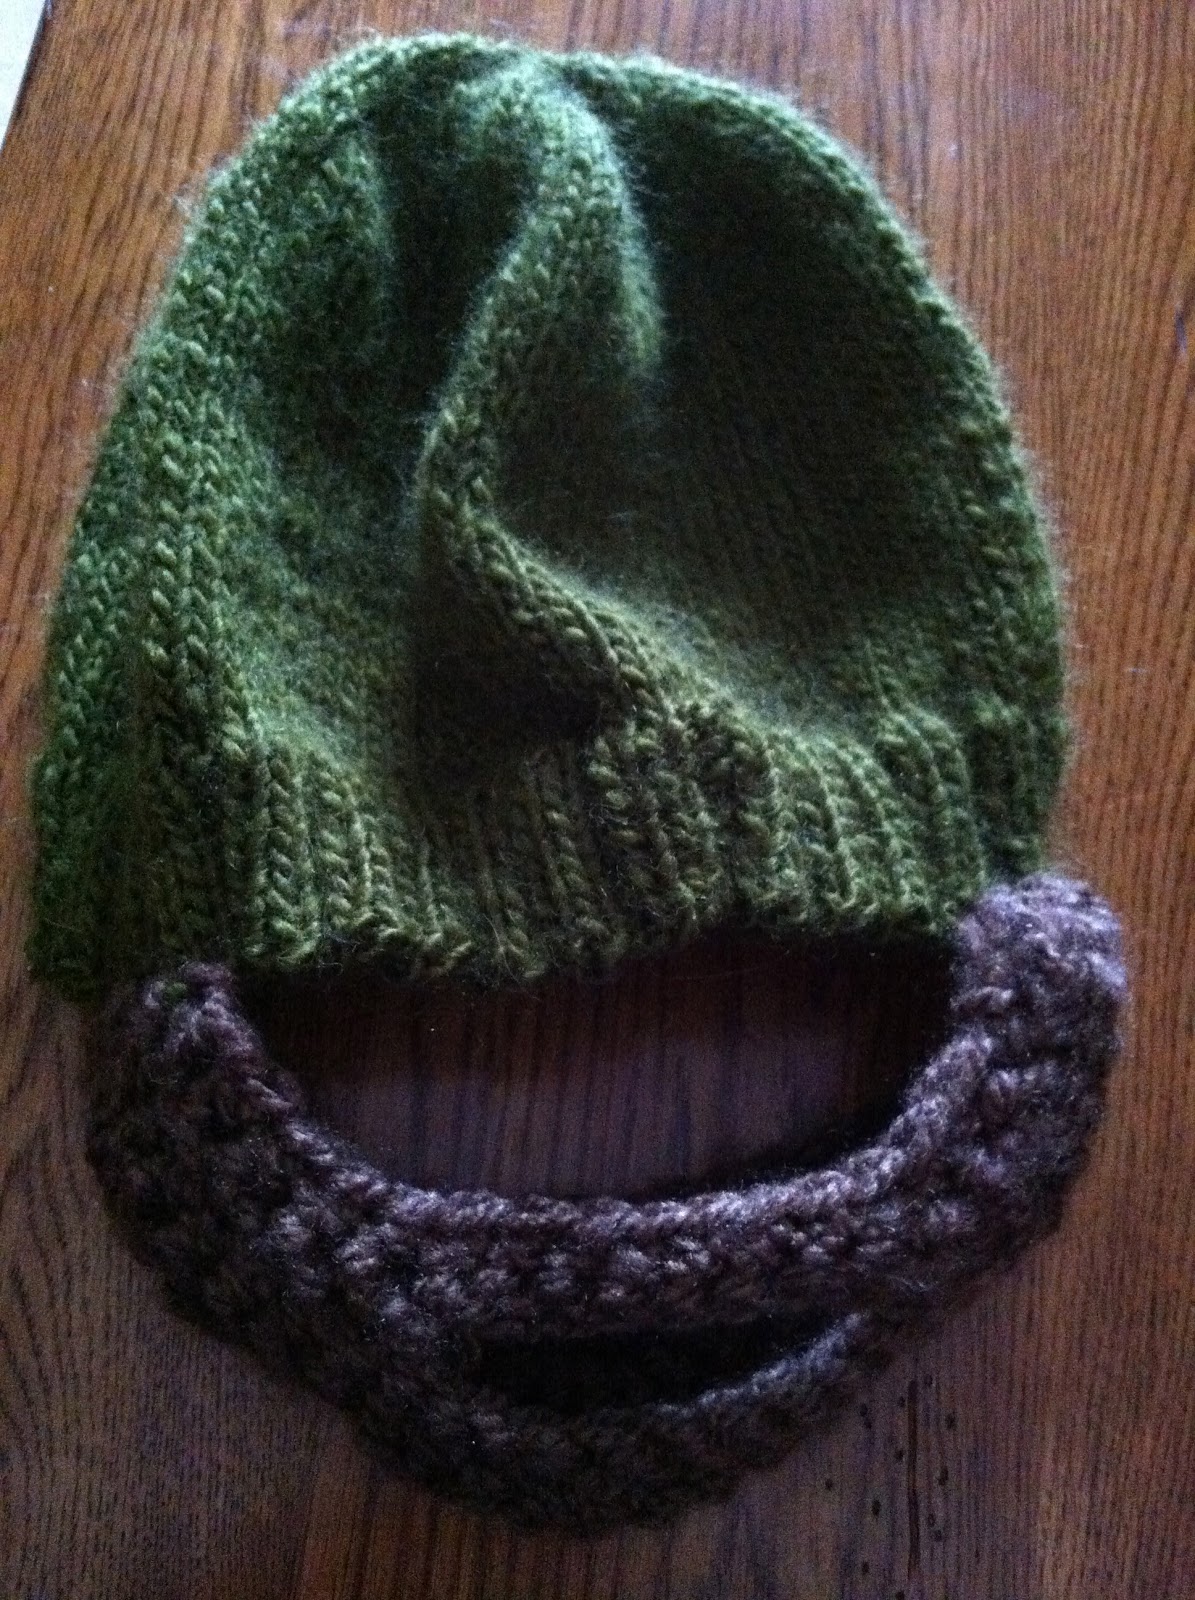
The beard hat is the biggest rage here in the Midwest.  I knitted & crocheted this one for the Redneck Gift exchange that we participated in.  

I embroidered a few tea towels for my MIL, and failed to get completed pictures:

Despite my diligent watering....  my Christmas tree died 2 weeks before Christmas!  Just dropped all of it's needles and decided it was done....


....so we ran out and bought a fake one!  We are now officially a 'fake-Christmas-Tree-houshold':

But.... I love how it looks.

And even though Christmas is over, I am still working on projects!!!  Which I can't wait to share!  Hope everyone had a great holiday and I wish you all a fantastic New Year!!!!

Tuesday, January 24, 2012

Embroidery

I wouldn't say that I am an avid embroiderer or anything, but I do like to embroider here and there.  Out of all the crafty things that I do, I find embroidery to be the most time consuming.  And that might not be very accurate, but it definitely seems more time consuming because it keeps both of my hands busy and I have to actually pay attention.  So watching my kids or TV while embroidering proves to be somewhat difficult...  as opposed to knitting, for example.

This Christmas, I decided to make a few embroidery projects.  1st up was a direct rip off :-)  I saw this image on Pinterest and tracked it back to this blog.  I instantly wanted to make this for my hubbs for Christmas. Not only was it cute, but we sell the exact Joel Dewberry fabric at work and it would look great on my upcoming "Woodland Creature" wall that I plan on making in my living room.  Here is the inspiration:

I didn't draw the heart on first, I just free-handed it... so it is a little lopsided (in my mind making it more authentic looking and definitely handmade).  And I also had to add in our middle initials, since we have the same 1st and last... it would look like my hubbs was crushing on himself :-)  I also bought a "woodland" themed frame that I actually had to paint and adjust the color to match better.  But it is pretty much a direct rip off.  (Click the links above and the pic to get to the original blog)

When I was buying the embroidery floss for this project, I got an idea to embroider a set of tea towels for my in-laws.  They have a "Cowboys & Indians" theme in their house, so I was going to mimic that in their towels.  These were iron-on embroidery patterns that I purchased, and I just used the colors that they suggested, since they matched the colors in my in-law's kitchen perfectly.  I ironed transfers onto 3 towels but I only completed 2 of those for their Christmas present and I ran out of time for the 3rd.  The last one will end up taking less time than the other two, and I plan on embroidering that one to give them soon.


Notice that the Sheriff is the Cowgirl and the Deputy is the Cowboy, I told my mother-in-law that I made it that way so that my father-in-law remembers who is boss :-)  hehe  I am knitting up a storm, more to come soon!


Thursday, September 8, 2011

Baby Boom

Another baby, another Nappy Bag.  This is one of my favorite go-to gifts for new or expecting moms.  Sometimes I knit hats and booties, but if I actually have the time to sit down and make something, these nappy bags tend to be a little more "instant gratification".  I have made many including this one, this one and of course mine.  The pattern is actually called "Nappy bag" and it is made by Amy Butler.  I have made some minor alterations for aesthetics and function so the ones that I make are a bit different than the pattern...  but the pattern is a good one and pretty easy to make.  I highly recommend it!


The pattern also comes with instructions to make a changing pad and the cover for the changing pad.  The intention is that the changing pad is rolled up and fits into a "yoga mat style bag" for transportation.  This was the first time that I made the changing pad and I thought that rolling it and putting it into a bag was a little much to be carrying around in the diaper bag.  So, I skipped the bag, took a bunch of liberties with the changing pad and decided that a folded version was a little less bulky. Basically I just used the size as a reference and made up the rest.

The best (or worst) part about the nappy bag pattern is that there is a ton of extra fabric left over.  So I used some of the scraps to patchwork the "pretty side" of the changing pad.  I used a solid colored flannel for the "functional side".  Despite having made a quilt before, I have never machine quilted anything.  I thought that this would be a good opportunity to test out those skills since this was such a small piece.  I quilted this one in the traditional diagonal pattern.  It turned out kind of "Vera Bradley", which (no offense to her or her admirers) I am not really a fan of.  But it was o.k.  I think I might do it differently in the future but I love how this one tuned out.  I picked a coordinating fabric for the binding and made my own "bias" tape.  I didn't actually cut it on the bias because I didn't like the lay out of the fabric pattern on the diagonal.  I used natural cotton batting for the inside so the entire changing pad is 100% cotton which means that it is 100% washable!!


Since I had extra fabric, I also made a diaper pouch.  I saw this free pattern on line and thought I would whip it out.

I used left over cotton batting for the inside and leftover fabric + linen that I had.  I liked how it turned out....  I think I would make some simple alterations for the next time to make construction a little easier. (I didn't iron it after I made it, so pardon the wrinkles)....   it also tuned out to be deep enough to also house a small disposable container of wipes, which I added after the pictures were taken


And last but not least here is the actual bag.  Can you tell that the baby is a girl?  Even when I am making these for the ladies that are having boys, I always make them with a feminine touch because I think that these make great purses even after the kiddos are potty trained.  The exterior fabric [Summer Totem AH37 in Grapefruit from the Loulouthi collection] and changing pad binding fabric [Hugs and Kisses AH45 in Candy from the Loulouthi collection] are Anna Maria Horner and the interior fabric is Art Gallery [Cherry Lace from the Bohemian Soul collection].  All of these fabrics were purchased at Urban Arts + Crafts in KC.


***Side Note:  I am a super over achiever and I have started embroidering care tags for the inside of these bags.  The first one I embroidered was for this bag and I just hand wrote out the instructions on a piece of linen and embroidered on top.  This time, I wanted to be a little more uniform so I though, 'why not stamp it first'?  I figured it was pretty much similar to an iron on embroidery pattern, but I have more control...  I used Tim Holtz's Distress ink, which I had.  These inks are semi transparent so if you end up seeing any of the stamp, it won't be that noticeable.  It turned out great and this has opened up a whole new world for "embroidery patterns".


That's it for now...  up next is a free crochet pattern!!