Materials:
Yarn- can use a single yarn or multiple yarns. There is not a lot of yarn used in this pattern, so you can use scraps. (The yarn used for this tutorial is Noro Retro in the color 9-Hot Pink.)
Crochet Hook- The size is going to depend on the yarn that you are using, use the size recommended for your yarn. (The size hook used for this tutorial is F5/3.75mm.)
Embellishments- A variety of beads, buttons, pendants, old clip on earrings... anything that can be sewn on as focal points in your 'pinwheels'.
Chain- a heavy-er weight chain is best with medium size links. You can also use ribbon, cording or anything similar to substitute for the chain.
Jump Rings
Clasp
Fabric (optional)- A soft-to-the-touch/silk-ish fabric in a matching or contrasting color. Although optional, I highly recommend it.
Thread
You will also need basic sewing and jewelry tools and notions.
Basic Pattern:
Step1: Crochet a variety of pinwheels, leaving 6"-8" tails for sewing.
Step 2: After finding a pleasing arrangement, sew your crocheted pinwheels together using some of your left over tails with a darning needle.
Step 3: After picking your embellishments, sew them onto the pinwheels in the center using your remaining tails and your darning needle. If necessary, sew embellishments on with sewing thread and a sewing needle.
Step 4: If their are any remaining tails, fasten them and cut off any remaining length.
Step 5: Cut a piece of fabric about the same shape as your configuration with an additional 2" on all sides.
Step 6: With wrong sides together, pin the fabric to the back of your configuration. Sew the fabric onto the back of your pinwheel configuration using a sewing needle and matching thread. Tuck in the raw ends of your fabric as you go along.
Step 7: Using a jump ring or a link of the chain (if chain links are not soldered), attach the chain onto each side of your pinwheel configuration. (If you are using a ribbon or something similar, just attach a jump ring to each side to tie your ribbon onto)
Step 8: Attach a clasp and your are done!
Long Winded Tutorial :-)
Before we start, here is the crochet abbreviations that I am using:
Ch: chain stitch
SlSt: slip stitch
Sc: single crochet
Hdc: Half Double Crochet
Dc: Double Crochet
St: Stitch
Sts: Stitches
Here are the patterns for the pinwheels that are used in this necklace. These are usually the circle bases for granny squares, crocheted hats and pretty much anything crocheted in the round. These are just examples of the pinwheels that I used in this sample necklace, but this is fully customizable. You can get as fancy and elaborate as you want. I used a variety to add interest and texture.
Note: leave 6-8" tails and don't tuck them in because we are going to use them later to sew each together and to sew on the embellishments.
Pinwheel A:
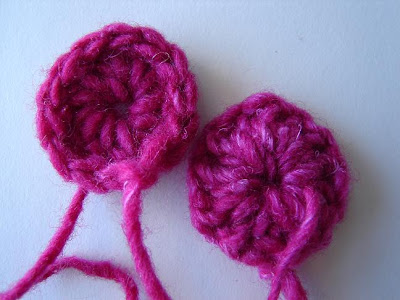
Round 1: Ch 4, SlSt in first Ch made to create a circle.
Round 2: Ch 3, DC 10 or so into the circle to fill the circle. SlSt into the last chain of the (Ch3). Fasten off. (note: the number of DC will depend on the yarn that you use. If you are using a stretchy yarn, you will most likely need more DC to fill the circle. You need enough to fill and complete the circle and the more you have, the thicker and more sturdy the pinwheel will be.)
TIP: the above picture shows Pinwheel A from the right side (on the left of the picture) and the wrong side (on the right of the pic). This is important to note because it doesn't matter which side you use for your pinwheels!! Which ever side you want to use is up to you, you can even use a variety of the same pinwheel, some on the wrong size, some of the right size to appear different.
Pinwheel B:
Round1: Ch 4, SlSt in first Ch made to create a circle.
Round2: Follow this pattern until you obtain the desired size: Sc into 1st Ch St, Ch1, Sc into the very next Ch St, Ch 1.... Fasten off when desired size has been reached. (note: you are putting a Ch St in between each Sc so that this circle will lay flat. Also, you can Sc into the back loop, the front loop or both and it will change the look of the pinwheel depending on which you pick. The pinwheel shown in the picture is made by Sc into the back loops. This pinwheel will look more like a spiral then a circle)
Pinwheel C:
Round 1: [same as pinwheel A]
Round 2: [same as pinwheel A]
Round 3: Ch3, 2 DC into all of the following sts. SlSt into the last Ch in the (Ch3), fasten off.
Pinwheel D:
Round 1: [same as pinwheel A]
Round 2: [same as pinwheel A]
Round 3: 2 Sc into all of the following sts, using front loops.
Round 4: 2 Hdc into all of the following sts, using front loops. Fasten off
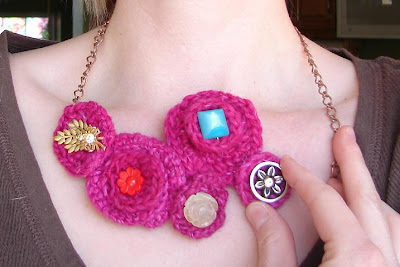
Crochet a variety of pinwheels (their are dozens of ways to do this. Use the patterns above or find your own unique twist on them). The sample necklace was made with 3 of pinwheel A, 2 of pinwheel B, and 1 each of Pinwheel C&D. I always follow the rule of Odds, where groups of odd numbers always look best, but you can use as many or as few as you like. Play around with different configurations until you find the one that is most pleasing to you. You can stack them and definitely overlap them.
Once you have found the arrangement that you want, start sewing them together. I usually start by sewing the stacked pinwheels together 1st. Use your reserved tails and a darning needle when sewing these together. Sew all of your stitches onto the backside of your pinwheels
Fasten off by knotting the yarn on the backside of your pinwheels and cut the tail that you used.
After you sew the stacked pinwheels together, use some of your other reserved tails to sew each pinwheel to the pinwheel next to it. Keep your stitches on the backside or wrong size of your pinwheels. If your pinwheels are touching more than one other pinwheel, then sew them to both where they touch or overlap.
Now you are ready to embellish!!! Play around with your findings until you are pleased with how they look. I tend to gravitate more toward the vintage buttons and vintage clip on earrings. You can use just about anything for this step as long as it has the ability to be sewn on.
Once you have decided on your embellishments, now it is time to attach them.
You can sew them on with any of the tails leftover and a darning needle, but you might have to use the matching thread and a sewing needle and sometimes a beading needle depending on how small the openings are on your findings. I recommend doubling your thread for strength. Another thing to mention is that you don't have to use embellishments, sometimes adding a pinwheel in a contrasting color will look great. You also don't have to put embellishments on every pinwheel. Play around with it and customize this as much as you want. You can also sew in tiny beads around the pinwheels too!!!
To attach clip on earrings, I usually poke the earring back though the center of the pinwheel and fasten the clip or screw to the earring. You could sew it into place, but I like having the option to change them out.
At this point, tuck in and fasten any remaining tails.
Sewing on fabric to the back is completely optional but I highly recommend this for 2 reasons. 1.For comfort, you don't have to worry about your yarn being itchy because the fabric will provide a barrier between the yarn and your skin... and 2. For support. By having the fabric sewn onto the back, it will restrict the stretching that will naturally happen with the pinwheels since they are crocheted and made out of yarn. Your original structure will remain more intact then if you were not to sew on the backing fabric.
Step 1: Lay the fabric with the wrong side up and place your pinwheel configuration face up.
Step 2: Cut the fabric in the basic shape of your pinwheel configuration, with about 2 extra inches on each side. Don't worry about perfection here!
Step 3: With wrong sizes together and using dress maker's pins, Pin the fabric to the pinwheel configuration, making sure not to stretch the pinwheels so that the original shape remains intact.
Step 4: With a sewing needle and matching thread, sew the fabric to the pinwheels a little bit at a time, folding under the fabric as you go along. Stay about 1/4" from the edge so that you have enough room attach your chain. I use a whip stitch and no one is going to see it when you are wearing it so don't worry about being perfect.
If you have a tight space between 2 pinwheels, you can cut the fabric in the center to make it easier to sew.
This is about what is should look like when you are done sewing.
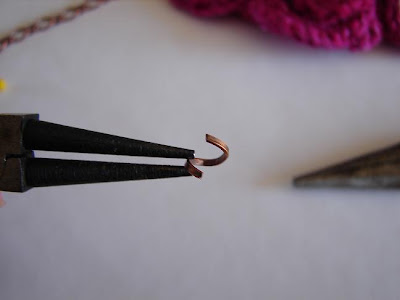
Using a jump ring (or link of your chain if it is not soldered), Open the jump ring and attach it to the upper corner of one of the sides on your pinwheel configuration.
Keep the jump ring open and thread your chain onto the same jump ring and then close the jump ring. (if you are using ribbon or something similar instead of chain, then just attach the jump ring to tie the ribbon onto)
At this point you will need to determine what length you would like your necklace at by trying it on. Make this measurement the longest you will wear the necklace because it will be adjustable if you are using the suggested heavy weight chain with medium sized links. (If using ribbon you will need to allot for the knot or bow tied in the back.)
Attach the other side of the chain to the other corner of the pinwheel configuration.
Separate the chain in the center and attach a jump ring and clasp.
DONE!!!! WoooHooo!!!!
I hope that this was helpful (and not just long winded). Please please please... contact me if anything in this tutorial was unclear and I will make needed corrections and explanations!!! Also contact me if you have ANY questions. Thanks a bunch, Cortney.



 Well, the new baby was a boy (Max) and she couldn't carry around a pink diaper bag, so I made her another slightly modified version of Amy Butler's Nappy Bag. I use my Nappy Bag even when there are no nappies in there so I try to make them look more like a purse and less like a diaper bag so they can actually be functional even after the kids are bigger. Here is what I came up with. The "leaves" on the front are hand appliqued with some embroidery on the top.
 I also wanted to make a smaller purse for her daughter, Chloe, so that she could match mom so I drew out a pattern for a nappy bag that was half the size of the other. I machine sewed in the appliques and the embroidery except when I personalized hers... I did that by hand :-)
 And I couldn't leave out Max, so I made this crocheted stacking toy that was a free pattern on Lion Brand's website. I sewed the frogs eyes on a little weird, but other then that I liked how it turned out. Chloe was playing with it when we went to visit Max, so I think it was a hit.
 I also made a baby sling for Max to be carried in. I didn't have a sling with my 1st but I did with my 2nd and I LOVED IT!!!! We took a trip to Washington and my 9 month old was in it the entire time. It was great! So that is my new go-to gift for new moms. It was the knitted baby booties, but with all these babies being born in the summer... It thought that I should go with something else. The sling is fitted and reversible and matches the nappy bag that I made her.
 Here is an old Bink 182 t-shirt that I had set aside for my recycled t-shirt laundry basket. I only wore the t-shirt a few times, so it was really like brand new but since I have had the t-shirt since college, it was quite snug. I decided to cut it to shape, redesign the sleeves into a cap sleeve-ish shape and crocheted the all-over trim. Since this was also a functional bolero (used to cover up my bra straps) I didn't want to worry about it sliding off my shoulder so I made a strap for the front that has 2 button holes sewn into it, with the buttons sewn on the inside of the bolero.... so it was optional. I loved how the bolero turned out and the best things about it are 1. it was completely FREE because I used materials that were laying around in my craft room and 2. it was the 1st time I used my button hole maker on my new-ish sewing machine and it was PURE MAGIC!!!!!!
  I also made a few hair clips. This one was made with a piece of left over Dupioni Silk, a piece of left over tulle and an old clip-on earring.
 This one is actually wool crocheted and felted flowers. I made this to go with my niece's play house that I made, but I didn't end up using them, so I made them into a hair clip :-)
 I am really into the recycled t-shirt yarn right now so I have been saving a strip (when I cut up the shirts for my laundry basket) for jewelry. Here are a few that I made for necklaces and I just added a brooch to each. The best part is that they are totally versatile because you can wear them without the pins, or with the pins, or with different pins. LOVE IT.


 I also decided that I would take this opportunity to try my hand at quilting. For the time being I am using the underside of my son's current bedspread until I get his quilt done. Quilting is a part of the craft world that I have yet to venture into. I have been itching to get into it and just needed a reason. I am going to start simple and just make rectangles that will be sewn vertically on the twin side spread. I had a few scraps that would work and now I am collecting fabric for the rest. I saw this baby quilt on the cover of Anna Maria Horner's new book and LOVED how she just threw all kinds of colors in there so this is my inspiration:
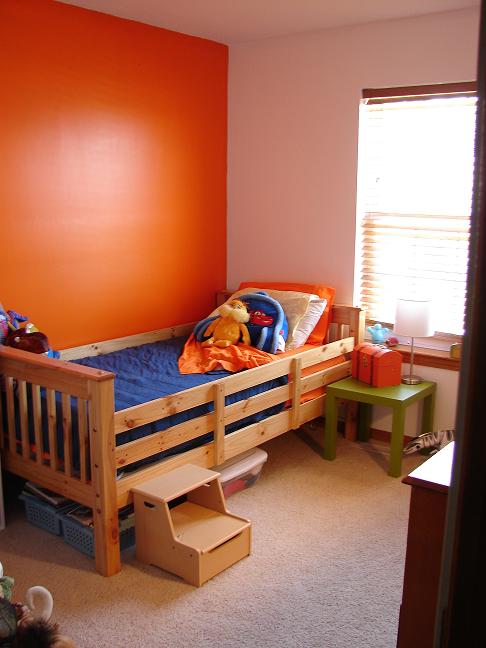
 I am having trouble finding fabrics in some of the most important colors. I, of course, need orange to tie in the HUGE orange wall that is in his bedroom and his 2nd favorite color is yellow. Both of those colors evidently aren't very popular with the quilters, especially with cute patterns, so I decided to collaborate with my son and print my own. I had him draw some pictures, we picked one of his alien drawings and now I am in the process of printing it on a slightly patterned fat quarter that I purchased. The ink was a little clumpy so I stamped the image onto the fabric and then had to clean it up by painting in the fill. The first round is drying and the next will be the outline. I am excited to see how it turns out.
 I am also getting some gifts finished up. I have a crochet project that I am working on, the picture makes it look like a large ottoman, but in reality it is only the size of a butter tub. :-)
 And I am finishing up a sewing project. This is the first time that I have attempted applique. I am also embroidering on top of the applique and so far so good. I can't wait to see the final result on this either:
 So I am keeping myself pretty busy. Hopefully I will have some completed projects soon to share :-)

 Mister Rob is currently my favorite paper cut artist. I think that his designs are really modern and innovative. This one in particular I LOVE.....


 We were on our way to Wicker Park, so I decided to look up some "crafty" stores and this was the 1st one we went to and let me tell you.... it was SOOOOO great! I was so in awe that I didn't get any pictures of any part of the store. I will post a picture soon of what I scored.


 I finally got the stand built!! (and when I say I, I mean my husband, hehe) We used an 18" round pre-cut piece of pine, a fancy heavy post made for a staircase (not quite 4"x4", but more than 3"x3"), a 1" dowel rod, 4 brackets and 5 casters. We screwed all the pieces together and I hung and stuffed the dress form. I stuffed it with anything I had, left over pieces of fleece, fiber fill, batting. The shape is a little distorted but the measurements are coming out right so I think that once it was stuffed it was bigger front to back then it should have been and a bit shorter side to side. I made it so that it was my height if I were standing on the base, so that I could accurately hem skirts and dresses. I left the neck open in case it needs to be adjusted in the future. I LOVE how it turned out and I can't wait to use it cause I have some BIG plans for some new/up cycled clothes!!! WOOHOO
 The rose in this necklace was made from a strip of Dupioni Silk that I just wrapped in a spiral and hand sewed into place. I sewed it onto a metal ring so that I would have something to link it to.
 This was my grandmother's necklace that I kept with the intention of taking it apart and using the pieces for other things. When I finished knitting my 'sweater' it matched perfectly. So I used a piece of wire to attach that big button for a little added interest.
 This comes as a free pattern found here. I added the flower and kept 2 of the tails to tie it onto the necklace with a bow in the back. That way it can be removable depending on what I am wearing :-)
 The cord on this one is actually made from a recycled t-shirt. I cut a strip horizontally on the t-shirt about 1.5"-2" in width. Then I pulled on it and it rolled up into this cord. That is one unbroken piece that wrapped around my neck 3 times from 1 t-shirt strip. I had this old silver broach that my uncle gave to me for a birthday present when I was like 14? And so I just pinned it on. Also versatile and changeable :-)