Thursday, January 31, 2013

Sari Ribbon Scarf

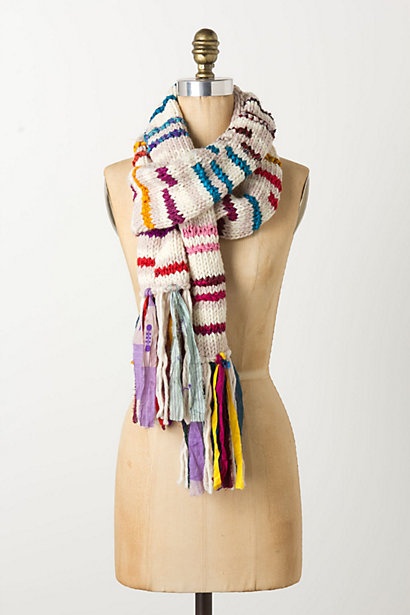
I have been on a scarf kick lately.  I am currently knitting my 3rd scarf this week (I know, crazy!!!!)  The first one I made is an Anthropologie copy.  I saw this Anthro scarf and had. to. make. it!  There were a few things that I decided to adjust but 1st,  here is the original:


I wanted mine to have less of the Sari Ribbon and more yarn so that the colors popped more.  Here is how mine turned out.


Here is the Pattern:

Supplies: 
1 Skein Berroco Vintage in cream.  Purchased here.
1 Skein Sugar 'N Cream in ecru (from my stash)
Size 17 knitting needles
Size 15 24" circular knitting needles (note: I used what I had, 15s work, 17s would work too)

Holding one strand of Vintage and one strand of Sugar 'N Cream together, on the larger needles, cast on 11 stitches.  Knitting in stocking knit (1 row knit, 1 row purl), knit with the 2 cream colored yarns, held together as 1 yarn.  Knit in Sari ribbon as often as desired, intarsia style.  (I cut the sari yarn apart to control which color went where).

**to explain this a little better, I would sometimes start the row with the sari silk, drop the silk mid row, pick up with cream yarns and finish the row.... on the next row I would knit with the cream yarns until I got to the stitch I dropped the silk, then I would knit to the end of the row with the silk.   Sometimes I would knit with the cream yarns until I would get mid row, then pick up the sari silk, Sometimes I would knit the whole row with the sari silk.  This is the fun part, just play with it until you get the look you want.

**Tip: make sure that you twist the cream yarns and sari silk when you switch off.  This will prevent gaping holes.

**Tip: the Sari Ribbon size is inconsistent, if you get a relatively wide piece, you can cut the ribbon in half vertically to make a better gauge. 

Knit until you reach a desired length and bind off.  My version is roughly 5' 6" before fringe.

With the 2 cream yarns held together, on the circular needle, pick up stitches along one side of the scarf and knit in garter stitch (knit every row) for 4 rows.  Bind off.  Repeat on the other side of the scarf.  Tuck in all of your tails **tip: for the tails at each end of the scarf, tie them off but you can leave them hanging as part of your fringe. Cut fringe (cut 16" pieces of sari silk and cream yarns.  For the example, there are 9 pieces of Sari silk on each end of the scarf and 9 pieces of cream yarn) **note the cream color yarns were held together and treated like one piece of yarn for the fringe.     Attach fringe on to both ends of the scarf using a Larks Head Knot (click here for tutorial).  (you can add more or less fringe as desired.)

And there you have it.  Feel free to e-mail me if you have any questions and Enjoy!  Until next time, Happy Knitting! 

Tuesday, January 29, 2013

Photography

Last year I finally purchased a DSLR camera.  Previously, I had been dying to get one.  I took most of my digital pictures with a small Sony point and shoot and it served its purpose.  One of the few classes that I managed to retain most of the info from in college, was my basic Photo 101 class.  Things like lighting and composition really helped make my point and shoot create some decent pictures.  However, I wanted more...  especially of my kids.  The worst part was that there are soooo many buttons and functions and digital thingies on this darn DSLR that I have had no idea of how to work it. I looked up a few online tutorials and they helped some....  but I knew that I still wasn't getting the most out of my camera out of sheer operator ignorance.

So recently my friend, 'Jen-ay', told me that her favorite photographer was going to start offering workshops on how to teach moms how to take better pics of their kids and how to use their DSLR.  Whaaaa????  Sign me up!  So a few weekends ago Jenny and I took the class/workshop and it was PERFECT! Adrienne Maples and Rob James did an amazing job teaching about composition, lighting and most important to me.... how to use my DSLR camera!  So my pics are going to start getting much better!

I am super grateful for the class and I have been sooo excited about using my camera ever since!  If you live in the Kansas City area and want some assistance on how to take better pics....  I HIGHLY recommend taking the "Camera How?!" workshop!  They already have a sign up for March. Check them out at Adrienne Maples Photo Studios in Overland Park, KS!  Click here to go to her website.  Click here to go to her blog. And Click here to learn more about their workshop!


Until next time, Happy 'Shooting'!

Monday, January 28, 2013

Shalom Sweater

I have been itching to make a sweater.  I didn't want anything too time consuming, and nothing complicated.  I have had this free pattern Q.ed on my Ravelry for a long time, so I jumped right in and started it, thinking that it was going to take me weeks.  I was completely surprised when it only took me 4 days!!!!  It's knitted on large needles with bulky yarn and it's a top down sweater.   It's knitted in the round with no sewing so when you are done.... all you have to do is tuck in the ends and sew on a button!  I love how it turned out and would definitely be interested in making more! (you can find the free pattern here).


I have a few more projects in the works that will be done to share very soon.  Until then, Happy Knitting!  

Friday, January 25, 2013

Knitting Bag

Years ago, my husband's grandmother, Bev, gave me all of her knitting/crochet supplies.  I just started really getting into knitting and she wasn't able to knit or crochet anymore so whalaaa, I had an instant yarn stash!!!  Granted, most of the yarn was itchy acrylic from the 70s in very 70s colors, but I adored it all!!!  I still have a lot from that stash and I have used a bunch too.

As Bev would find more yarn and supplies, she would send them along... even now, when she is no longer with us, her husband still finds things here and there and makes sure they make their way to my house (those are the supplies that I find really special).  In the last group of things I received,  was a fold-able knitting basket.  It's probably not THAT old... maybe purchased in the 70s or 80s?, but it doesn't matter because I was instantly in LOVE!!!!  Not only was it sentimental because it was very well used by my late friend and 'grandmother-in-law', but it is also a functional piece that I will use everyday! 

I knew for sure that I was going to have to replace the lining before I could use it, so it has been sitting in a corner of my craft room waiting until I could make time to work on it. Last week I finally had the time to spend, so I sat down to tackle the project.  As I was removing the lining....


..... I notice that the exterior fabric was shot too!  I know that they have had mold issues and alike in their home and there was evidence on both the interior and exterior fabrics, and I didn't want to take any chances so I had to replace the exterior fabric too.  I failed again to get a 'before' image but here is what the exterior looks like:


I picked out my 2 favorite fabrics from my fabric stash and went to work.  The construction was very interesting and I had to do a lot of hand sewing but I LOVE the final result!  


I absolutely treasure it!  It has been in use since it was completed, filled with various knitting projects and I can honestly say that there probably won't be a day that goes by that it won't be filled with yarn and supplies.  I think that Bev would really like it and I think that she would be tickled to see how much I use and adore it!  I will honestly think of her every time I see it and just in case I forget (won't happen), I found these 2 little safety pins attached to the old fabric that is clear evidence that she used this basket, so I think they will make a permanent home pinned to the new fabric of her basket!


Until next time, Happy Sewing!

Thursday, January 3, 2013

Baking

Christmas is the time of year when I go a little crazy in the kitchen!  I love to bake but I rarely eat much of it.  I am more of a taster and I love variety, so I use the holidays to test out new recipes and perfect my favorites.  Here are just some of the things that I made for this Christmas.

One of my favorite things to make is marshmallows....  it's pure magic!

And I like to dip them in dark chocolate and sprinkle with Heath bits:  recipe found here (follow through step 5 and garnish as desired)

Gingerbread cookies are a Christmas staple!  I remember making these with my mom when I was a kid. Similar recipe found here.

These are my favorite, homemade peppermint candies: recipe found here.


This was a new recipe and it was amazing! Cappuccino Fudge Cheesecake: recipe found here.

Camouflage cupcakes, perfect for our Redneck gift exchange, even the cupcakes are camo! recipe found here.

And Meringues!!!  I LOVE these!  I made them in peppermint and butter rum this year.  They are like eating flavored sugar air.  It's awesome.  recipe found here (follow through step 5 & I use gourmet oils instead of extract)

Believe it or not, this was only about half of the baking I did!  Until next time, Happy baking!

Monday, December 31, 2012

Tribute

This very blog is all about my nutty domestic tendencies and my crazy crafting compulsions.  I work part time at an Independent craft boutique and I teach a variety of crafty classes, including crochet.  I get asked by many customers and my students how I started crafting and how I ended up so domestic.  I believe that there HAS to be a domestic/crafty gene that I inherited and there is only one person (well 2) to blame.  My mother passed this crazy gene on to me from this lady, my Grandma.


My grandma did it all, cooked, cleaned, sewed, crocheted, crafted....  you name it.  My mom and my Grandma both taught me how to crochet and I will never forget that!  I remember a specific time when my Grandmother was "heckling" me (her term) because my crocheted beanie was more of Yarmulke.

On Friday, December 28th 2012 my Grandma passed away.  She celebrated her 90th birthday this past June and lived a very full life.  She had 6 kids (wow), 11 grandchildren (if my math is correct) and currently 8 great grandchildren.  She had a great and feisty sense of humor and she told the best stories!!!

Every time I crochet I will think of my Grandma....  she will be missed dearly by many people and her stories will live inside us all!

Love you, Grandma!

Oh MY!!!

I can't believe that it has been so long since I last posted!!  Christmas season this year was crazy, to say the least.  The preparations and the family that we visited kept us very busy.  This year I decided not to make my Christmas cards...  that adds a whole new level of busy onto an already busy season.  Plus this year I was a little more interested in making my gifts.

And so here are some of the gifts that I made...

I made a TON of these Headbands/Ear Warmers this year:


...  I had to make one for my in-law's dog too!!!  :-)

I had fun mixing yarns for a cowl:

This is the flip toy that I made for my 4 month old nephew.


And he needed a hat too, although it didn't fit because lil man had a HUGE head!  :-)

 I made a similar hat for my son's teacher.... hopefully it fits :-/

I also make a bunch of these scarflettes:


I made this ruffle scarf for my ma...

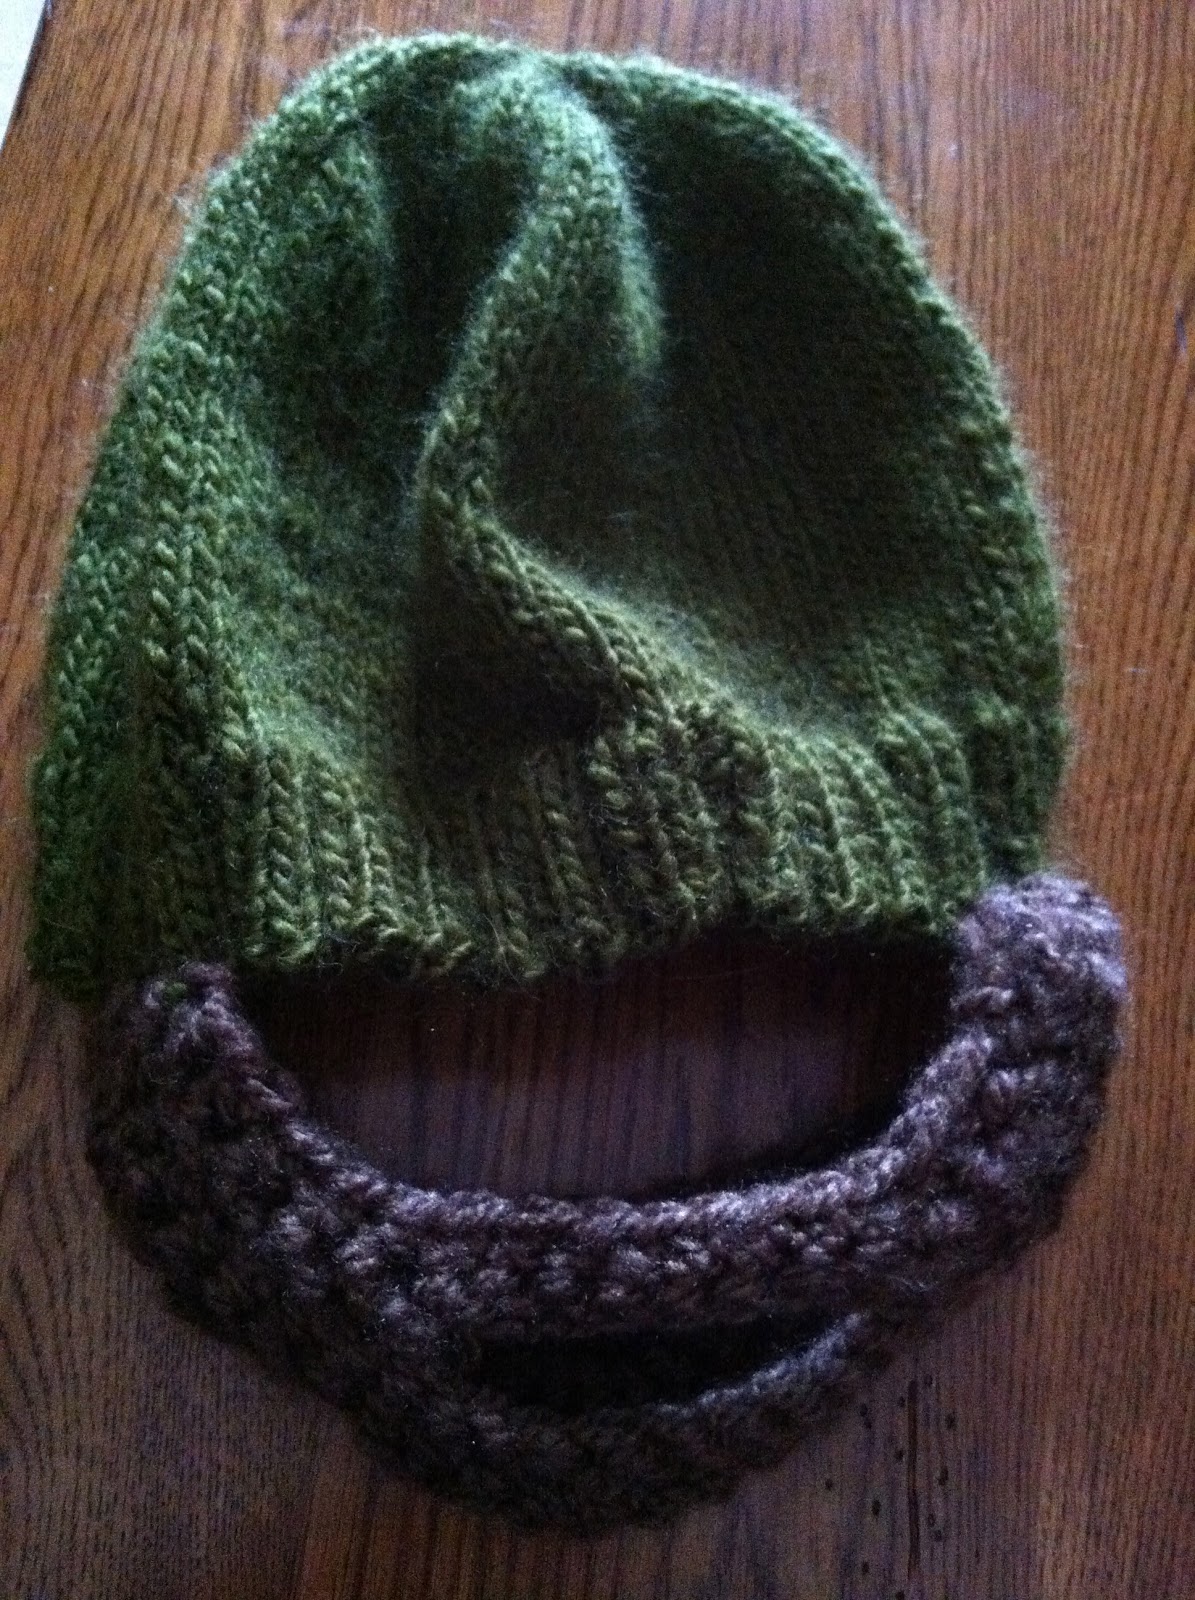
The beard hat is the biggest rage here in the Midwest.  I knitted & crocheted this one for the Redneck Gift exchange that we participated in.  

I embroidered a few tea towels for my MIL, and failed to get completed pictures:

Despite my diligent watering....  my Christmas tree died 2 weeks before Christmas!  Just dropped all of it's needles and decided it was done....


....so we ran out and bought a fake one!  We are now officially a 'fake-Christmas-Tree-houshold':

But.... I love how it looks.

And even though Christmas is over, I am still working on projects!!!  Which I can't wait to share!  Hope everyone had a great holiday and I wish you all a fantastic New Year!!!!

Wednesday, November 28, 2012

The Jessica Scarflet!!!!

'Tis the season for a free pattern!!!  I can't take credit for this one, my girl, Jessica made this and I became completely obsessed with it last year and made one for pretty much everyone on my list.  She posted a free pattern here or you can just use this one that I adapted.


The Jessica Scarfflette
Hook Size G, 2 skeins Manos Silk Blend
Ch 31. 
Row 1: 2 DC in the 4th Ch from hook. Skip 2 Ch, SC in the next Ch. *Skip 2 Ch, 5 DC in next Ch* repeat from * 3 times. Skip 2, Sc in last chain. Turn.
Row 2: Ch 3, 2 DC in same Sc from previous row. *SC into the 3rd DC from previous row, 5 DC in the next SC in the previous row.* repeat from * 3 times. SC in the top of the Ch 3 from previous round. Turn.
Repeat Row 2 until piece measures aprx. 28”. On last row, do not end yarn, continue scallop pattern around the other 3 sides of scarf. Sew on 5 buttons, vertically, along the bottom right side of the scarf. Buttons will fit through holes created by crochet stitch.


Here is a recent one that I made with a different yarn.  This is made with Monsoon, which is a chunkier yarn, so I used a K hook with this guy.  Below I have a comparison between the Monsoon version and the Manos version.


Hope you like this pattern.  I also have another free crochet pattern coming soon! Until then, Happy Yarning!