Friday, April 20, 2012

Food Swing

I decided to share one of my family's all time favorite meals.  There are a lot of meals that we make and love, but not all at one time. This one appeals to each one of us, it's quick and easy to make and I just love it.  This recipe can be found here, it is an Emeril recipe and normally I'm not a huge fan of his (most of his stuff is just a little to "BAM" for my tastes) but I just happen to catch his show a few years ago on the Food Network and I'm glad that I did.  This recipe is what he calls a "Waffle Iron Reuben" and basically it is just a fancy grilled cheese with meat and make-it-yourself sauce.  For those of you that aren't normally Reuben fans, I challenge you to try it.  Unlike most Reubens, this one doesn't have sauerkraut in the sandwich... although you could add some if you like.  I get my meats and cheese from the deli department of the grocery store and I assemble the sandwich with sauce on the inside of both pieces of bread, both topped with a slice of cheese and the meat sandwiched in the middle.  Don't forget to butter the outside of your bread like grilled cheese! You can "fry" this guy in a pan if you like or use a panini press if you have one, but I use my George Foreman Grill.  Did I mention how quick and easy this meal is???  Try it, let me know what you think!


Thursday, April 19, 2012

DIY-Memory Game

I have taken a vow of money saving.  :-)  I am making some attempts to save a bit so my challenge is to make any upcoming projects for free.  I also have a TON of stuff in my craft room, so hopefully this will alleviate some of the mess and clutter in there as well as save a buck or two.

Up first is my DIY Memory Game.  My 3 year old has yet to learn his letters.  He can sing the song but can't identify any of them so I have been trying to come up with a clever way to teach them to him without him knowing it. And it hit me while playing this vintage Memory game.

It is an Animal Family version, where instead of finding 2 cards that match identically, you have to find the "mom" animal and the coordinating "baby" animal.  So I decided to make an "Alphabet Family" version where you have to match the upper case letter with the lower case letter. I am sure that there is a manufactured game with this format, but not for free!  :-) Here is how I made it, so that you can make your own too.

Materials

Chip board
Ruler
Pencil
Scissors (or your preferred cutting method)
Fine Grit Sandpaper
Paint & Paint Brushes

To start you will need some chip board.  I have some chip board shapes made for scrapbooking and other crafts, but I didn't have 52 of the same one.  So I turned to my old Art Paper pads from college.

Most of the time I use the chipboard backing for a protective surface when I am painting, but this project definitely uses it to it's full potential.

I drew out a grid/cutting guide;  I just kept halving the measurements in both directions until I had a size that I thought was appropriate.  And as it turns out, that made enough for the project with 12 to spare (keeping in mind that I didn't include the bottom 1.5" of the board because it was bent).


I used an X-acto knife to cut out the strips, then scissors to cut out the individual pieces (You can use whatever cutting method you prefer).

I then used a fine grit sandpaper to sand down any imperfections along the edges.

I used the Making Memories Scrapbook Paint.  (I'm not entirely sure they still make it).

This paint is designed for paper so it has less water, it's more opaque than other types of paint and it dries very quick.  My concern was that the pieces would buckle with too much moisture.  But, use what you have, it is worth a try.  I first painted one side black. (You will have to excuse the Christmas-printed-plastic-table-cloth that I bought after Christmas for 50¢ specifically for craft projects)

Then I painted "roads" on the black side with gray paint.

Then I painted the letters on the "Kindergarten Lines" with white.  On half of the pieces, I painted all of the uppercase letters, on the other half I painted all of the lower case letters. (my intention was to make them look like chalkboards)


And whaaaalaaa.  A Letter Learning Memory Game!


I could have made the plain side more snazzy but I wanted them to be very uniform (so no cheating) and durable.  I considered scrapbooking paper, paint and all other kinds of possibilities but ultimately I decided to keep them their "natural" hue.  They may not be the cutest on that side, but they are definitely functional.  The best part is that these can double as flashcards and can also be used as a guide when learning how to write letters.

I hope you find this helpful and good luck making your own fun version!!

Wednesday, April 18, 2012

Coming Up.

Been Busy.  Don't have much to share.  I am working on something fabulous, though...  so hopefully I will have something to share soon.  Here are some teaser photos to get you by and an explanation of what I have been up to lately.  :-)

This is my latest project and it is taking me FOREVER.


I've been working in the garden...

And enjoying my bounty.

I have been making more with my "Cinderella images"

My BFF, Brad, got me hooked onto the "Draw Something" App.  Which proves to be fairly challenging with having to draw with just your finger and limited colors, however I am getting a huge kick of what I am coming up with.


Here are some pup pics for the fun of it.


Oh and Anni, my friend at work.

I can't forget about my loot from the bead show...  I haven't had the opportunity to play around with these... yet.  

That's about it.  I am trying to keep up with my garden and read some books so my crafty things have been put on a bit of a back burner.  I am hoping that the creative juices start flowing freely once again and I can actually get some things made. Until next time!

Thursday, April 12, 2012

My Garden

This is what has been taking up my time lately.  A few years ago we tilled up a corner of our back yard and installed a garden.  It was originally just a typical garden... nothing special.

2008


2009

2010
In 2010, we took the fence down in the garden that bordered my neighbor's yard and he built the same size garden on his side, so the garden doubled in size.

In 2011, I am pretty sure that I didn't plan much and the garden just ended up full of weeds so I didn't bother taking pictures of it...   I don't even have any pictures with the garden in the background. 

When I originally built the garden, I had high hopes for the things that I would grow and the time that I would spend nursing my plants into edibles...  then reality the bugs hit.  In the midwest we are riddled with blood sucking insects like fleas, ticks, chiggers and mosquitos.  I'm not sure if it is my pale white complexion or the way that I smell, but these guys love me.  At the peak of the season, I can't even walk outside without getting eaten alive...  and considering that I am trying to grow an "organic as possible" garden... without using pesticides, there is no way that I can even get close to the garden after a certain point in the year.  Then it just ends up being this big block of weeds and a HUGE waste of time.  Then spring rolls around again and I seem to forget all about this and make another attempt at my garden.  This year, however, I did remember but I am making one last attempt before I throw in the towel.

With all of the images floating around Pinterest of raised bed gardens and the clever things that people are doing with pallets, I got a few ideas together and ran with it.  The idea is that I will have raised beds, rock in the pathways and if I treat the pathways, I might not have to compromise the "organic-ness" of the actual plants.  I realize that any use of Pesticides is a big no-no for the organic farmers, but I am going to have to do something here!  I am researching repellent flowers and beneficial insects, but in all honesty, I think I am going to need a little more help than that.

To give you an idea of the space, my side of the garden is 15.5' x 17' (my neighbors' side on the West, being identical) and behind the garden (on the south side) is a wooded lot, which aides to the large bug population.  Every year I make a guide as to what and where I planted everything.  This is the guide this year.  Things written in pencil have no yet been planted.


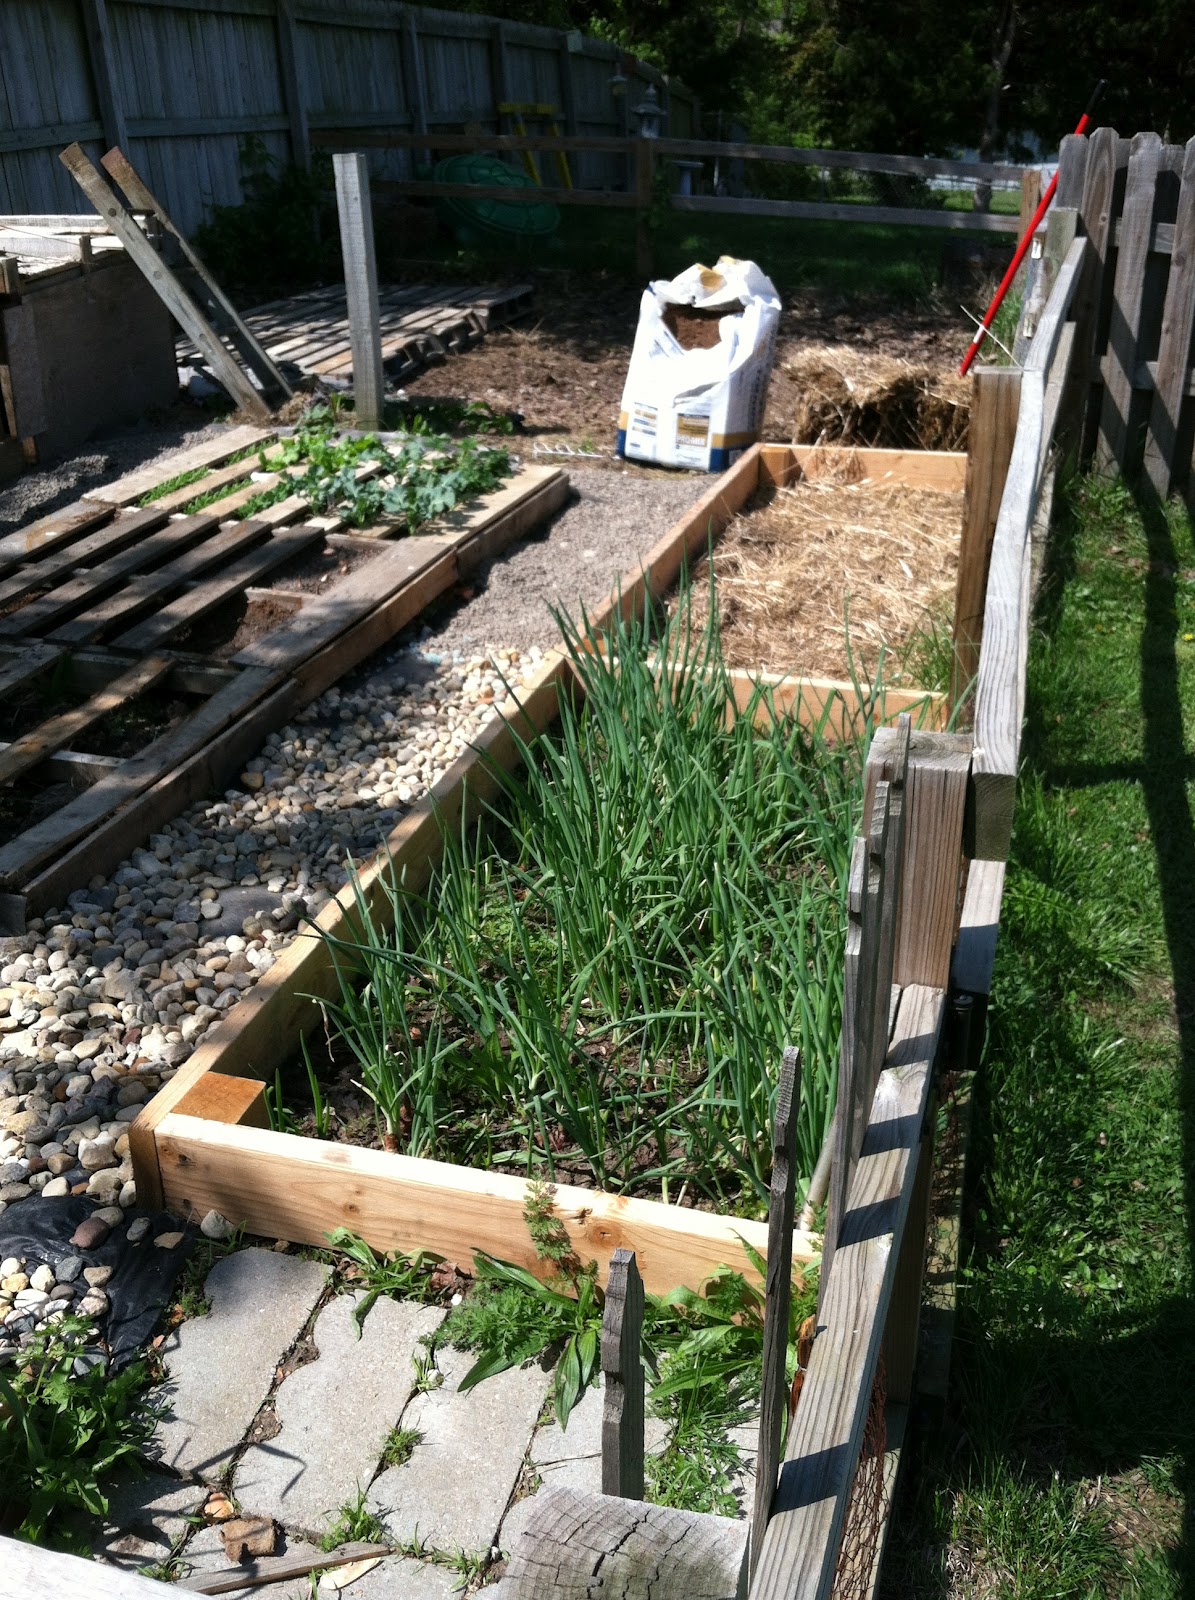
The garden is still a work in Progress, I don't have all of the rock in the walkways and it is a bit early to plant a few things, like tomatoes and peppers, so here it is so far.


These are the 3 pallets in the center of the garden, the top one being mostly cool weather plants.


 This is the herb section of the garden


And here are some close ups of the plants flourishing now.


My hopes aren't as high this year (I am trying to be more realistic), but so far so good.  I love how the garden is coming along and hopefully I will be able to keep ahead of the bugs and keep up with the weeds...  because those can be pretty overwhelming too.   I am trying to keep a detailed record of the progress from this year, so hopefully there will be plenty more to come.