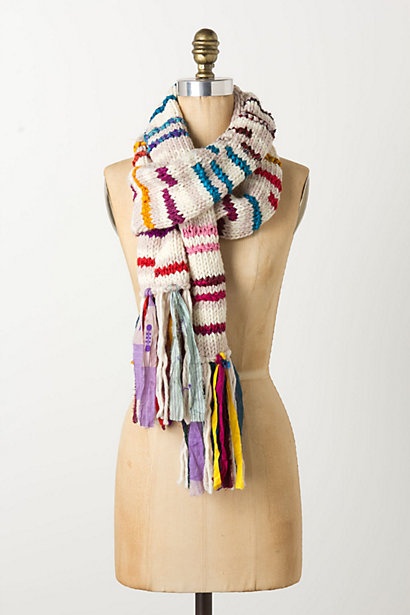
I wanted mine to have less of the Sari Ribbon and more yarn so that the colors popped more. Here is how mine turned out.
Here is the Pattern:
Supplies:
1 Skein Berroco Vintage in cream. Purchased here.
1 Skein Sugar 'N Cream in ecru (from my stash)
1 Skein recycled Sari Ribbon. Purchased here.
Size 17 knitting needles
Size 15 24" circular knitting needles (note: I used what I had, 15s work, 17s would work too)
Holding one strand of Vintage and one strand of Sugar 'N Cream together, on the larger needles, cast on 11 stitches. Knitting in stocking knit (1 row knit, 1 row purl), knit with the 2 cream colored yarns, held together as 1 yarn. Knit in Sari ribbon as often as desired, intarsia style. (I cut the sari yarn apart to control which color went where).
**to explain this a little better, I would sometimes start the row with the sari silk, drop the silk mid row, pick up with cream yarns and finish the row.... on the next row I would knit with the cream yarns until I got to the stitch I dropped the silk, then I would knit to the end of the row with the silk. Sometimes I would knit with the cream yarns until I would get mid row, then pick up the sari silk, Sometimes I would knit the whole row with the sari silk. This is the fun part, just play with it until you get the look you want.
**Tip: make sure that you twist the cream yarns and sari silk when you switch off. This will prevent gaping holes.
**Tip: the Sari Ribbon size is inconsistent, if you get a relatively wide piece, you can cut the ribbon in half vertically to make a better gauge.
Knit until you reach a desired length and bind off. My version is roughly 5' 6" before fringe.
With the 2 cream yarns held together, on the circular needle, pick up stitches along one side of the scarf and knit in garter stitch (knit every row) for 4 rows. Bind off. Repeat on the other side of the scarf. Tuck in all of your tails **tip: for the tails at each end of the scarf, tie them off but you can leave them hanging as part of your fringe. Cut fringe (cut 16" pieces of sari silk and cream yarns. For the example, there are 9 pieces of Sari silk on each end of the scarf and 9 pieces of cream yarn) **note the cream color yarns were held together and treated like one piece of yarn for the fringe. Attach fringe on to both ends of the scarf using a Larks Head Knot (click here for tutorial). (you can add more or less fringe as desired.)
And there you have it. Feel free to e-mail me if you have any questions and Enjoy! Until next time, Happy Knitting!


4 comments:
This is so pretty!
xx
Beautiful adaptation! I will use your instructions to make it!
I love your scarf! When you say intarsia style, does that mean you dropped the cream yarns and picked them up later, thereby having loops of yarn hanging on the back of your scarf? I have never done intarsia.
@cekcmama5, Intarsia is a style of color work. Essentially you do drop the cream and pick it up later but to avoid a hole where you dropped the cream, you must twist the cream yarn with the sari silk before you start knitting with the sari silk. Each time you change colors, you have to remember to twist the yarns, otherwise you will end up with a hole between the 2 yarns in the color change. Also, by doing this, once you have knitted the row, there should not be any loops left over. I hope this answers your question!
Post a Comment